If you are trying to figure out how long should a gel polish be cured, then you need not worry because this is one of the reasons why the gel polish comes off or chippies earlier than required. The answer to how long should a gel polish be cured lies in your knowledge on how long should a gel polish be cured to get perfect looking nails. Here is how long should a gel polish be cured:
| Tipo di mantello | Tempo di polimerizzazione LED | Tempo di polimerizzazione UV |
|---|---|---|
| Base | 45 secondi | 90 secondi |
| Rivestimento colorato | 60 secondi | 2 minuti |
| Top Coat | 60-90 secondi | 2 minuti |
As long as you follow all these tips on how long to cure gel polish, there won’t be any chipping or dulling of your nails. If you don’t do things correctly and just guess how long to cure gel polish, it can cause some issues. You need to know how long to cure gel polish for professionally looking nails.
Punti di forza
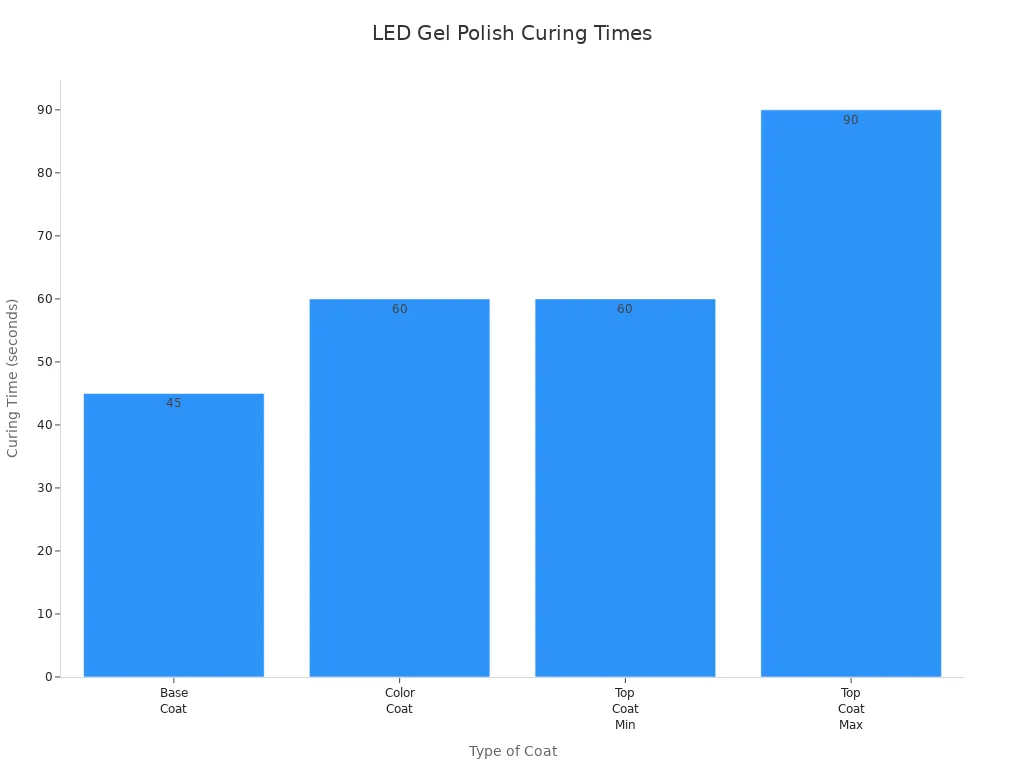
- Ensure that each coat is cured properly and in accordance with the advised time period to prevent any issues such as chipping and peeling off. Use 45 seconds for curing base coat and 60 seconds for curing color coat under LED lamps.
- Remember to use thin layers while applying gel polish. It takes more time to cure thick layers of gel polish, and this causes lifting and wrinkling.
- Make sure to set a timer for every curing process. This allows you to maintain the drying time accurately, ensuring a long-lasting manicure.
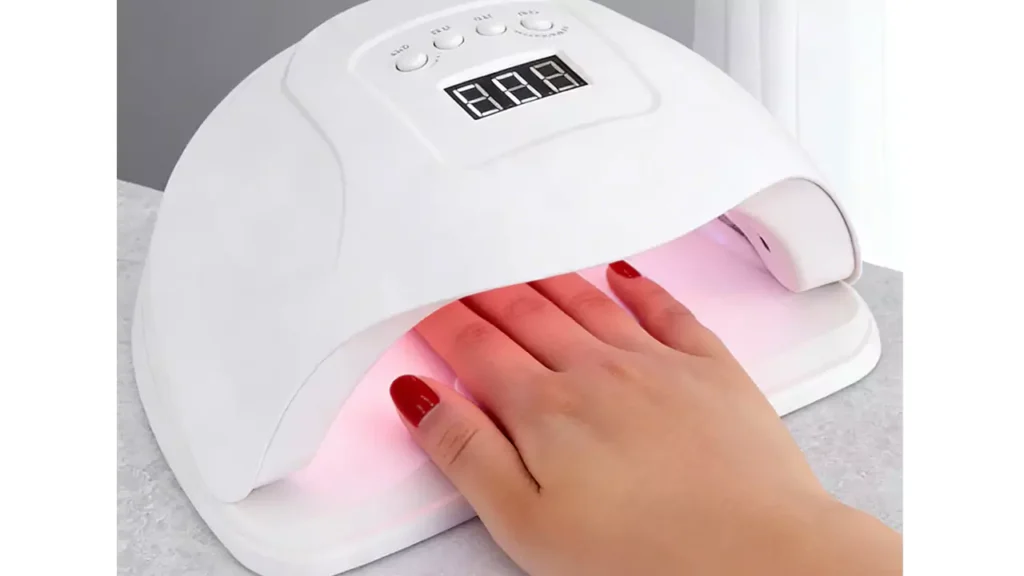
- Know what lamp you are using. LEDs dry gel polish much faster than UV lights, which you should keep in mind when curing your manicure.
- Take note of whether your nails have dried correctly. They will be smooth, solid, shiny, and free of air bubbles.
Quanto tempo occorre per asciugare lo smalto gel sotto le lampade LED e UV
Curing Times for Base Gel, Color, and Top Gel Coats
If you wish to have a durable gel manicure, the most important aspect would be to understand the curing times for each coat of gel polish. For the base gel, color gel, and top gel coats, there is required curing time that cannot be overlooked.
Ecco una tabella riassuntiva per aiutarti a ricordare i tempi di stagionatura ottimali:
| Tipo di rivestimento | Tempo di polimerizzazione LED | Tempo di polimerizzazione UV |
|---|---|---|
| Base | 45 secondi | 90 secondi |
| Rivestimento colorato | 60 secondi/strato | 2 minuti/strato |
| Top Coat | 60-90 secondi | 2 minuti |
È necessario rispettare questi tempi per ogni strato. Se si salta o si accorcia il processo, lo smalto potrebbe rimanere appiccicoso o staccarsi troppo presto. Rispettando i tempi corretti, si otterranno unghie lucide e più durature.
Recommended next step
Smooth, Long-Lasting Gel Routine
Bubbling, peeling, shrinkage, and dull wear are usually system problems. Build the manicure with prep, base, color, and top coat together.
- Prep the nail plate before color.
- Use a base coat that matches the gel system.
- Finish with a compatible top coat for wear and shine.
Shop long-lasting routine kitSee no-wipe top coatCompare all routines
Differenze tra lampade LED e lampade UV
It is natural for you to ask what significance this lamp holds. Both LED and UV lamps cure gel polish. However, the process of curing is quite different with both types of lamps. An LED lamp uses a limited spectrum, while a UV lamp uses a wide spectrum.
Ecco un semplice confronto:
| Tipo di lampada | Tempo di indurimento | Intervallo di lunghezze d'onda |
|---|---|---|
| Lampada UV | Più lento | Da 320 a 400 nm |
| Lampada a LED | Più veloce | Da 370 a 380 nm |
With an LED lamp, you will complete your manicure faster. If you have to cure your nails using a uv light, then you should allow more time for every coat. Depending on the lamp used, the curing time varies; hence, one should check the lamp being used before applying any product.
Perché i tempi di asciugatura esatti sono importanti
Maybe you feel like a few seconds don’t matter, but they do. That is why you must stick to the exact curing times for each layer and lamp:
Curing correctly prevents you from having tacky or sticky nails.
Each layer takes its unique amount of time due to differences in viscosity, formula, and light sources.
Insufficient curing can lead to lifting and chipping of your nail polish.
Excessive curing results in the polish becoming very hard and causes it to not stay on your nail anymore.
Inconsistency with the proper schedule can result in larger complications. It may lead to chipping, peeling, and discoloration. Skin irritation and allergies are common if the polish is not dried properly. Dusting due to poorly cured nails can lead to inflammation and even the loss of your nail.
TIP: Set a timer for each coat. This will help you keep track of how long you need to cure the gel polish and give you perfect-looking nails.
If you do everything correctly, you’ll have beautiful, durable nails. You’ll be free from all kinds of issues like chipping and peeling. This is why understanding how long to cure gel polish is so important.
Perché il tempo di asciugatura influisce sulla durata dello smalto gel
Resistenza e brillantezza
You will want your gel nails to appear shiny and remain that way for many weeks. This is possible only when you cure each layer of the gel nails for the correct curing time period. What importance does this have? The curing process fixes the color of the nail and gives strength to the nail. When it is done incorrectly, you will face some issues.
- Un tempo di asciugatura adeguato solidifica il gel e fissa il colore, garantendo una finitura resistente e brillante in grado di sopportare l'usura quotidiana.
- Una polimerizzazione insufficiente può causare sfaldature o scheggiature, mentre una polimerizzazione eccessiva può causare fragilità o scolorimento.
- Una finitura lucida dopo l'indurimento indica che lo smalto gel è completamente asciutto, mentre una superficie opaca significa che è necessario più tempo sotto la lampada.
A proper curing process initiates a reaction known as polymerization that results in the hardening of the polish. If the process is not done right and the timings are not accurately gauged, there is a possibility that the polish will peel off or appear dull.
Salute e sicurezza delle unghie
However, when getting your nails done, you may never think about their well-being. Scientific evidence proves that prolonged exposure to UV lights can be detrimental to both nails and skin. For example, a relatively safe period of time would be four minutes. Longer periods of UV light can lead to cellular damage and even increase the risk of developing skin cancer.
In case your nail polish is not cured well, there may be uncured chemicals left behind that can come into contact with your skin, causing allergies. This will cause some to experience symptoms such as itching and redness. Others might end up losing their nail plates because of weakened nails. Such problems can be avoided by curing your nail polish adequately.
Prevenzione di scheggiature e sfaldature
Your manicure should be lasting; therefore, avoid chips and peels within a few days. The only secret to having this is the curing process. When thick coats are used, when curing time is short, and when one does not cap the free edge, the chances of the polish lifting up or chipping are increased.
Chipping and peeling could also result from thick coats, inadequate curing, and failure to cap the free edge during the application of the gel polish.
When one takes time curing his or her gel polish properly, the outcome will be perfect nails.
Rischi di una polimerizzazione errata: polimerizzazione insufficiente o eccessiva dello smalto gel
Segni di gel smalto non completamente asciutto
Your nails may seem perfectly cured right after curing, but not properly curing your nail polish means you will have obvious signs soon after. Not leaving your gel long enough to cure can make you regret spending time doing your nails.
- There will be wrinkling on top of the cured polish.
- You may spot bubbles underneath the cured polish.
- Your nails will feel bumpy due to too much gel polish.
If you notice any of these problems, then your gel polish hasn’t cured completely, and you will have to correct this problem before applying further layers.
Suggerimento: Make sure that you apply thin layers and cure them for the prescribed time period. That will help you avoid these common problems.
Problemi causati dall'eccessiva polimerizzazione
You may assume that having your nails exposed to the light for slightly more time will be okay. Well, it won’t. Excessive curing will be just as bad as insufficient curing. These are some things that could happen when you over-cure your nails:
- They will become too dry and fragile.
- The gel polish will begin to peel off the nail plate.
- The color of the polish will fade or turn out unevenly applied.
What happens is that by over-curing, the gel becomes too rigid. It is unable to stay flexible and attach to your nail properly. If you want the manicure to remain on for longer, you should make sure you are not over-curing your nails.
Impatto sulla durata delle unghie
Una polimerizzazione errata non solo rovina immediatamente l'aspetto delle unghie, ma influisce anche sulla durata della manicure. Se non polimerizzi correttamente lo smalto gel, noterai dei problemi prima di quanto pensi.
- Gli strati non sufficientemente polimerizzati rimangono morbidi e instabili. Si staccano rapidamente.
- Gli strati spessi impediscono alla luce di raggiungere tutti gli strati. Questo lascia un punto debole vicino all'unghia.
- Saltare il tempo di asciugatura corretto rende la manicure fragile. Non durerà a lungo.
Se desideri unghie forti, belle e resistenti, devi asciugare correttamente lo smalto gel. Seguire i tempi giusti mantiene la tua manicure fresca e ti aiuta a evitare scheggiature, sfaldature e altri problemi.
Fattori che influenzano il tempo di asciugatura dello smalto gel
It is possible that you may ask yourself why your gel manicure either dries quickly or takes ages to dry. Here are some considerations which determine this. For you to be able to understand how long it takes for gel nail polish to dry, there are a number of issues you need to consider.
Potenza e tipo della lampada
The drying time varies depending on your lamp. There are lamps available in various wattages, which have an effect on the drying time of gel nail polish. Those with low wattage will be slow and may fail to provide proper curing, leaving the nails soft. The high wattage ones are fast, although they may heat up when rushed.
| Livello di potenza | Tempo di indurimento | Potenziali problemi |
|---|---|---|
| Basso | Longer (UV: ~2 min, LED: >30 sec) | Unghie non sufficientemente curate, morbide e fragili |
| Alto | Più veloce | Picchi di calore, polimerizzazione irregolare, rischio di danni |
The right lamp would be one which has the entire range of wavelengths from 365 to 405 nm. This will allow curing of all types of gel in an effective manner. The best lamps for home use are those ranging from 24 to 36W. There are mini lamps for travel, medium size for one-hand operation, and large lamps for two hands.
Formula in gel e colore
The composition and coloring of the polish you use also affect the drying process. Certain gels require additional curing due to their high level of energy consumption, which may vary according to the mixing of different gel brands. Variations in the curing process may result in some nails becoming harder than others. Gel with dark color or pigments requires more time for curing or an enhanced intensity of light to do so effectively.
- Lamps should have sufficient wattage depending on your gel polish.
- Always use one brand of gel polishes including the base coat, top coat, and color.
- Dark colored gels require a bit more time.
- Always apply a thin coat of the gel.
Spessore dell'applicazione
The application process is equally important as the lamp and the polish. Thick applications mean it will take longer to dry, causing it to chip or peel. Thin applications mean quicker drying time and smoother application. When thick applications are used, you run the risk of having wrinkled nails. To avoid wrinkling and peeling, apply a thin layer, leaving space from your cuticle area.
- Thin layers are essential for proper curing.
- Thick layers require more time and may lead to issues.
- It is important to allow every layer to dry completely before applying another one.
Considering all these points, you will understand precisely how much time it takes for gel nail polish to dry. This way, you’ll achieve better results.
Come garantire tempi di asciugatura precisi per lo smalto gel
Consigli per una corretta stagionatura in casa
The first thing that you should do is to follow the correct procedure in order to achieve perfection with regard to your nails. It is important that you take care in order to ensure that your gel manicure stays in good condition for long. So why is all of this important? Here is how you can succeed:
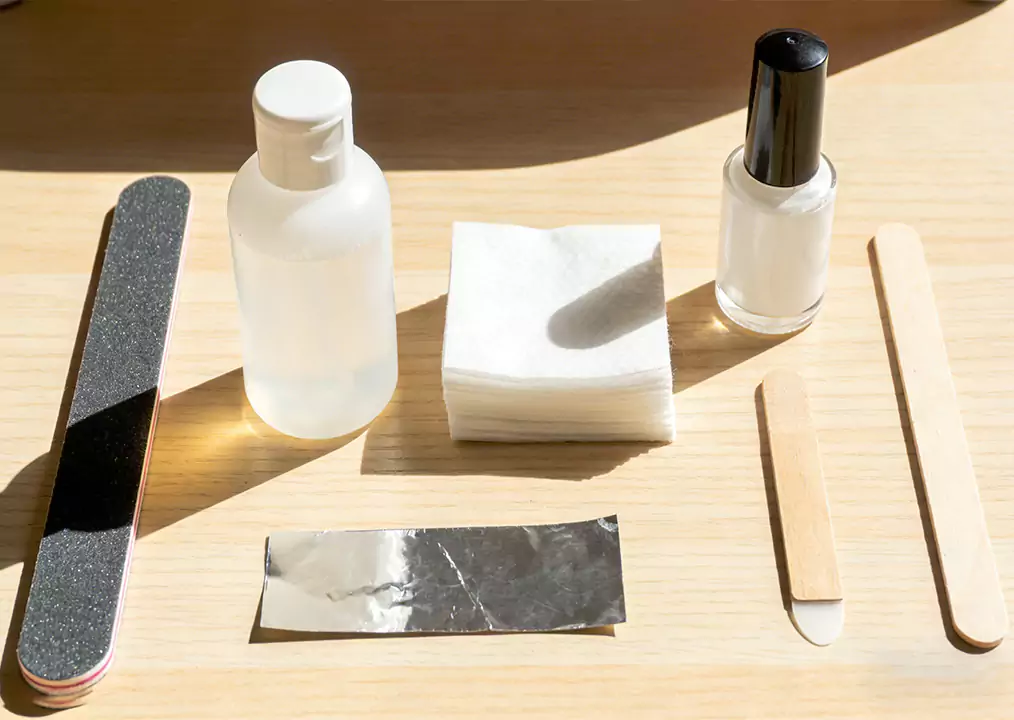
- Before you begin, clean and file your nails.
- Buff your nails and get rid of the shine.
- Push your cuticles back to ensure that the gel coats just your nails.
- Wipe your nails using alcohol to remove the oils present.
- Put an even and thin layer of gel base coat on your nails. Thick layers cure slower and might have difficulties.
- Cover up the free edge of your nails with each coat. This is to prevent the polish from lifting.
- Cure your nails under the lamp for the specified period of time. Do not estimate the time; set a timer instead.
- Remove any gel that is on your skin before curing the layers.
Suggerimento: segui sempre le istruzioni relative alla lampada e allo smalto. In questo modo potrai rispettare i tempi di asciugatura esatti ed evitare errori.
Come verificare se il gel è completamente indurito
Vuoi sapere se il tuo smalto gel è pronto. Ecco come puoi capirlo:
- La superficie è liscia e dura al tatto, non appiccicosa né vischiosa.
- Il colore appare brillante e uniforme.
- Non ci sono bolle, grinze o punti molli.
- Lo smalto non si sposta né si scheggia quando lo si picchietta delicatamente.
Se noti che uno di questi segni manca, potrebbe essere necessario un tempo di asciugatura più lungo. È meglio controllare dopo ogni strato piuttosto che correggere gli errori in un secondo momento.
Tabella di riferimento rapido per i tempi di indurimento
Non è necessario indovinare per quanto tempo lasciare asciugare ogni strato. Utilizza questa tabella per ricordare i tempi di asciugatura ottimali per il tuo smalto gel:
| Tipo di rivestimento | Tempo di funzionamento della lampada LED | Tempo di esposizione alla lampada UV |
|---|---|---|
| Base Gel Polish Coat | 45 secondi | 90 secondi |
| Smalto gel Color Coat | 60 secondi | 2 minuti |
| Smalto gel Top Coat | 60-90 secondi | 2 minuti |
Perché usare una tabella? Ti aiuta a evitare errori comuni come una polimerizzazione insufficiente o eccessiva. Seguendo questi tempi di asciugatura, otterrai unghie resistenti, lucide e durature.
You definitely want the longevity and beauty of your manicure. This is why you must adhere to the correct curing times for normal gel nail polish. Why? Because:
- Correct curing gives you an enduring, chiplees finish.
- Not adhering to proper steps will give you peeling or chipped nails, or worse, an allergic reaction.
- Over curing your regular gel nail polish will make it fragile and difficult to take off.
- The proper timing is key to the correct photochemical process.
Always make sure to read your lamps and gel nail polish directions. By curing your layers correctly, you can ensure that not only are you safe, but you also look great. You can have professional-grade nails without even going to the salon!
FAQ
Perché è necessario asciugare ogni strato di smalto gel per un determinato numero di minuti?
È necessario polimerizzare ogni strato per il numero corretto di minuti, perché questo fissa il colore e la resistenza. Se si ha fretta, il smalto gel rimane morbido. Se aspetti troppo a lungo, diventa fragile. I minuti giusti fanno durare la tua manicure.
Perché non puoi semplicemente lasciare asciugare lo smalto gel per qualche minuto in più, per sicurezza?
Potresti pensare che più minuti significano risultati migliori. Non è vero. Se lasci asciugare per più minuti, lo smalto gel potrebbe rompersi o sfaldarsi. La formula funziona al meglio quando si seguono i minuti consigliati per ogni strato.
Perché il tipo di lampada cambia il numero di minuti necessari per polimerizzare lo smalto gel?
Lampade diverse utilizzano luci diverse. Le lampade a LED asciugano più rapidamente, quindi occorrono meno minuti. Le lampade UV richiedono più minuti per asciugare ogni strato. Controlla sempre la tua lampada e segui i minuti indicati per ottenere i migliori risultati.
Perché un tempo di polimerizzazione troppo breve causa problemi con lo smalto gel?
Se si lascia asciugare per troppo poco tempo, lo smalto gel rimane appiccicoso o morbido. Questo fa sì che si scheggi o si stacchi rapidamente. È necessario lasciarlo asciugare per tutti i minuti indicati affinché le unghie rimangano forti e lucide.