Questa volta realizzeremo una nail art a tema "Cuore di Diamante". Dal colore di base alle decorazioni a forma di diamante, ogni strato esalta lo stile metallico e la raffinatezza, creando una nail art di grande impatto visivo e al tempo stesso squisitamente lussuosa. Diamo un'occhiata!
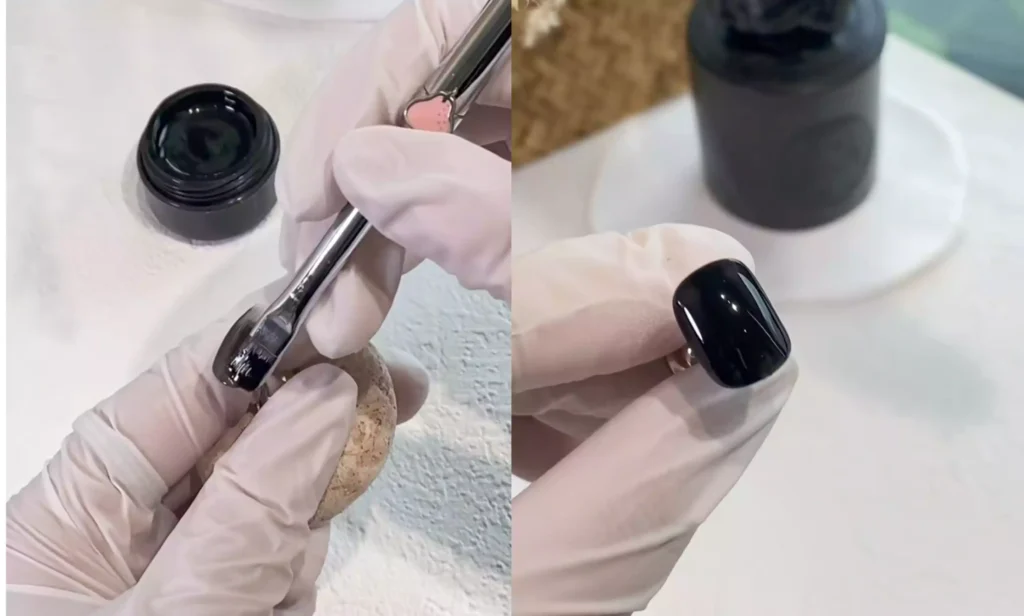
Fase 1: Preparare le punte delle unghie e il colore di base
Innanzitutto, applicare lo smalto gel nero come mano di fondo. Il colore di base nero non solo rende più intensi i colori successivi, ma dà anche il tono per un aspetto metallico e lussuoso. Attendere che il colore di base si asciughi e si indurisca.
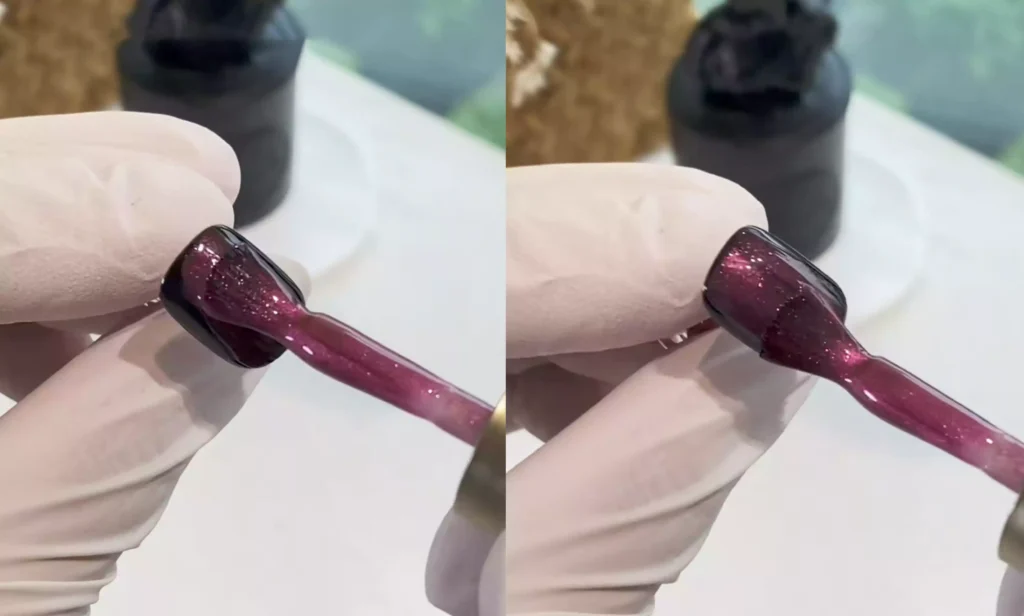
Passaggio 2: Applicare l'effetto occhio di gatto smalto gel
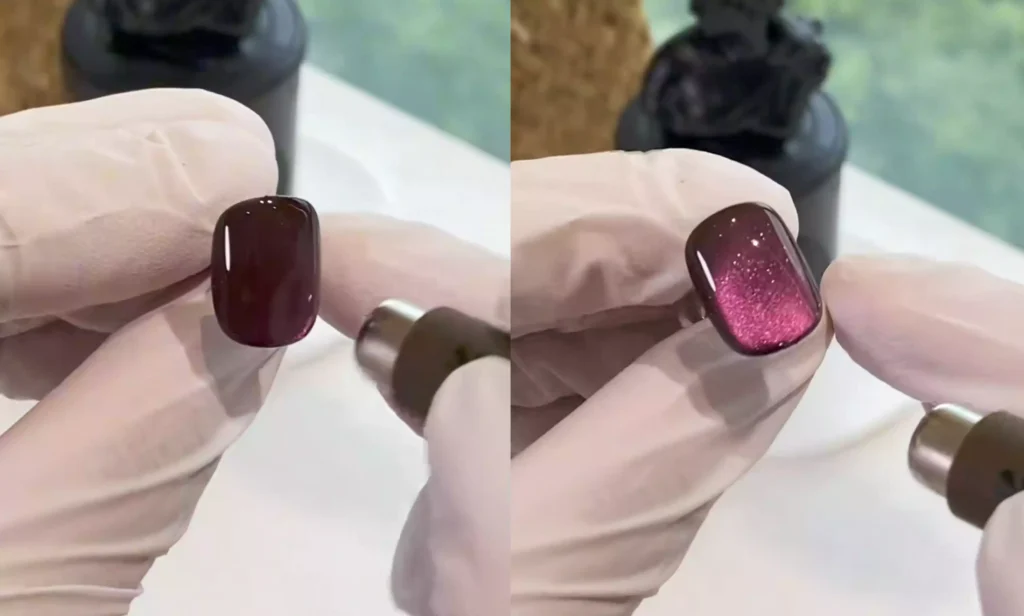
Prendi uno smalto gel effetto occhi di gatto altamente saturo (io ho usato CHROMÉCLAIR'S Smalto gel senza ema SE-10, che ha un colore e una consistenza lussuosi, un colore a lunga durata, è atossico e salutare) e applicalo uniformemente sulla base di colore nero. Il colore rosso rosato di per sé è vibrante e accattivante e, se abbinato all'effetto occhio di gatto, crea un delicato senso di rifrazione di luci e ombre.
Passo successivo consigliato
Crea il kit per un look di nail art
Per realizzare un tutorial di bellezza non basta una boccetta di colore. Scegli il colore, il dettaglio artistico, la tecnica di trasferimento o l'applicazione dell'adesivo e il top coat, tutto in un unico kit.
- Scegli il colore principale o il set.
- Aggiungi il dettaglio artistico: adesivo, gel per trasferimento, magnete o pennello.
- Sigilla il risultato finale con uno strato di top coat.
Kit per nail artVedere il gel di trasferimentoConfronta tutte le routine
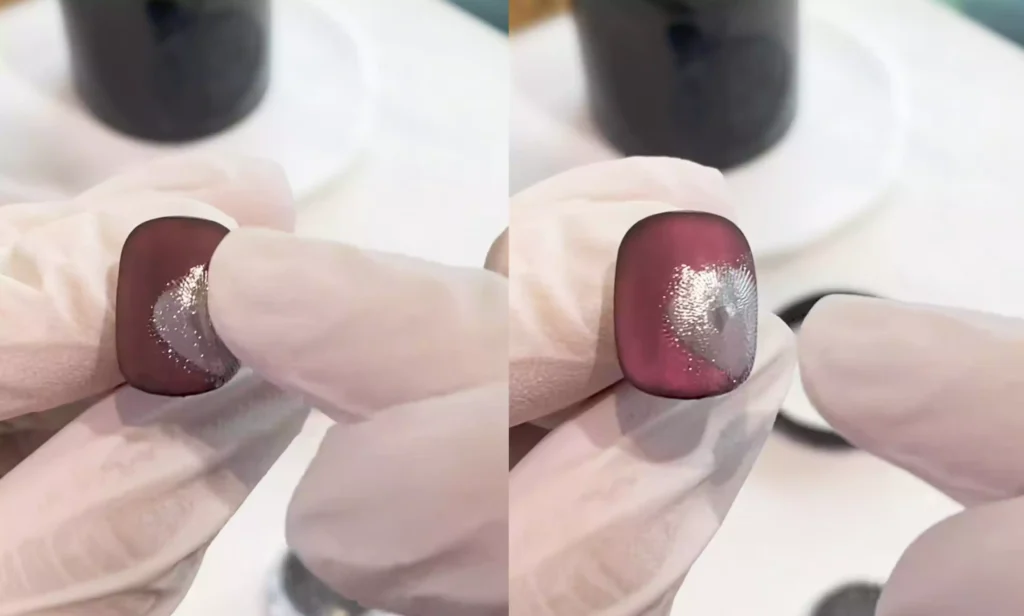
Dopo aver applicato lo smalto, usa una calamita a occhio di gatto per creare un effetto tridimensionale simile a quello delle perline di vetro, conferendo alla superficie dell'unghia profondità e brillantezza.
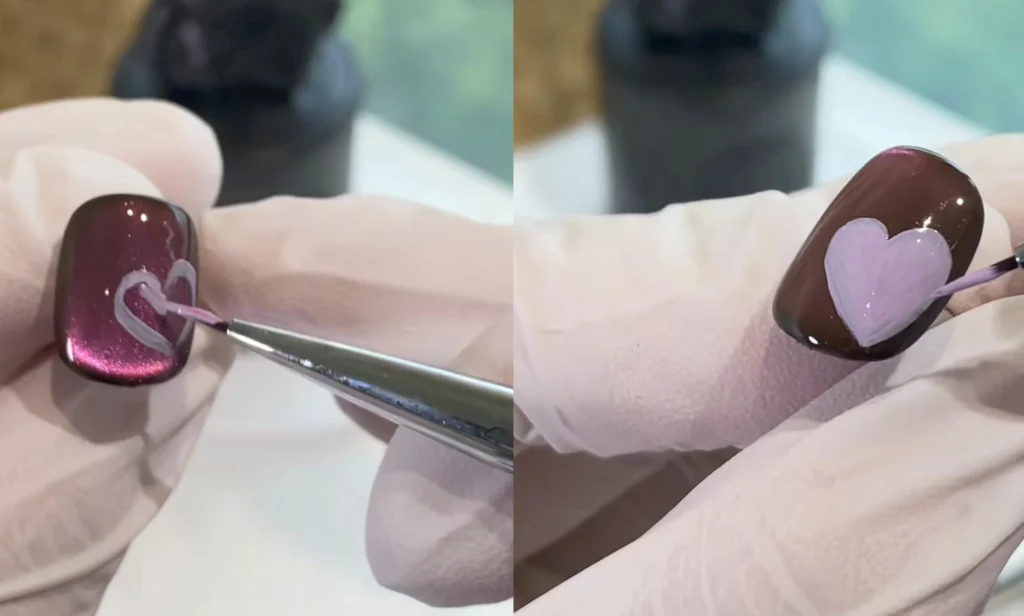
Fase 3: pittura e timbro a forma di cuore
Con un pennarello disegnare il contorno di un cuore sulla superficie dell'unghia, quindi riempire l'area del cuore con colla dello stesso colore (o di un colore abbinato). Regolare la forma del cuore durante il processo per rendere i bordi lisci e naturali.
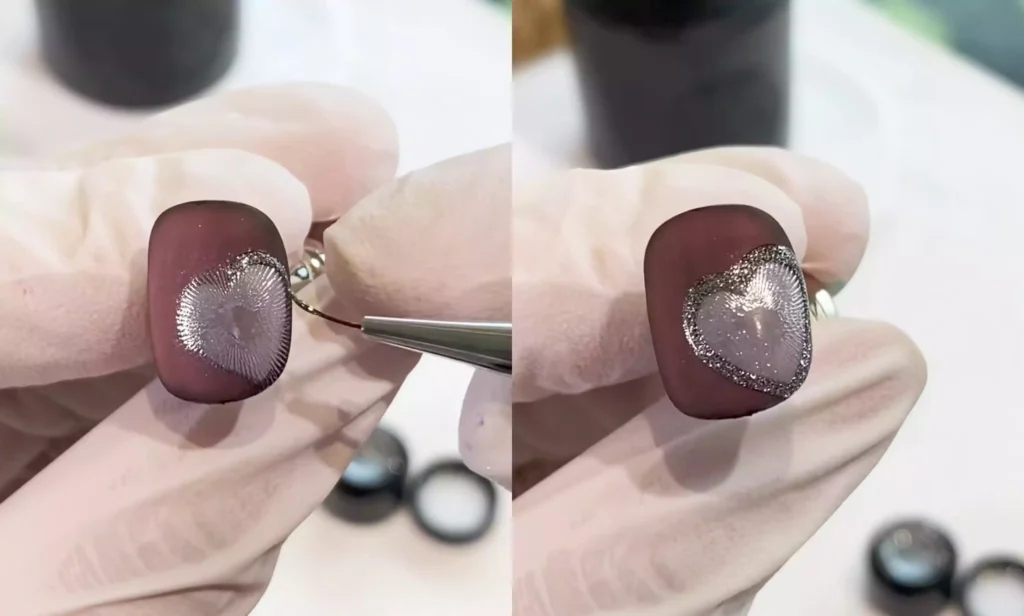
Successivamente, prendere la colla trasparente e utilizzarla con la lastra d'acciaio del modello e il timbro di trasferimento.
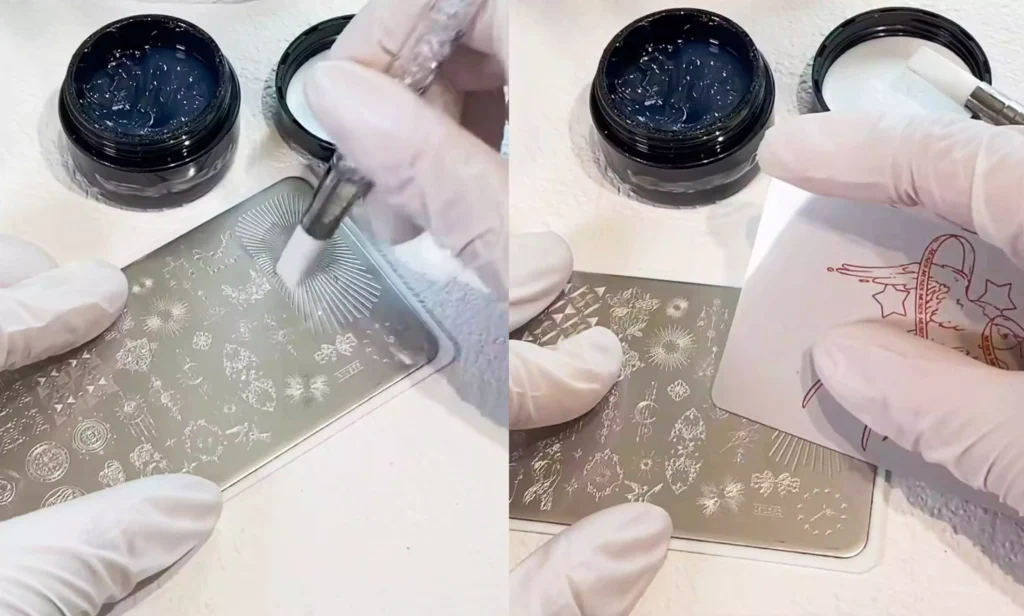
Immergere il timbro nella colla elastica, quindi prendere l'immagine dalla sagoma del timbro e imprimerla con precisione sull'area a forma di cuore.
Dopo la stampa, utilizzare uno strumento di pulizia per eliminare la colla in eccesso dai bordi del modello, in modo che il modello e il cuore si colleghino perfettamente.
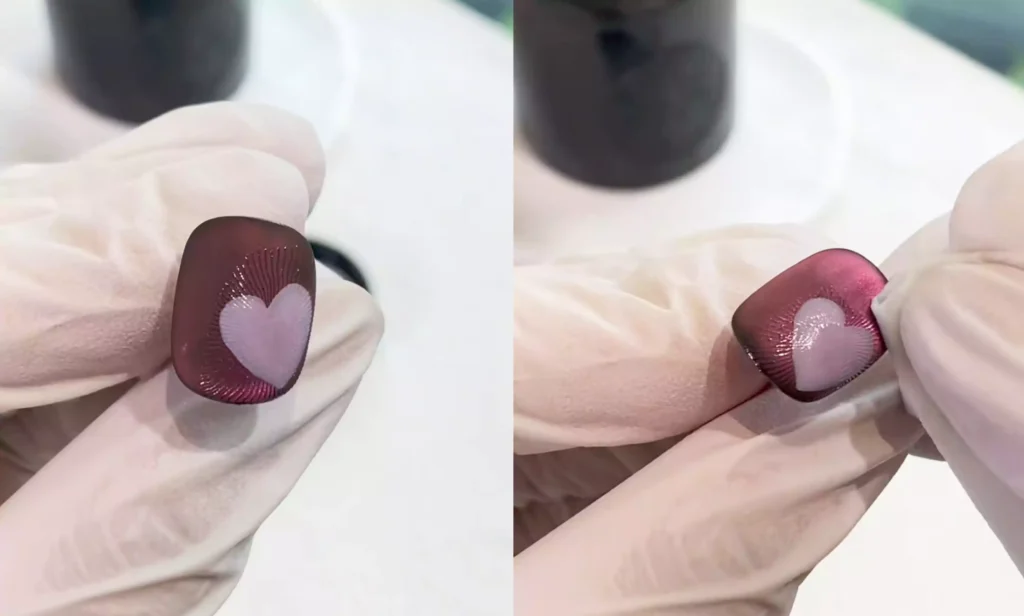
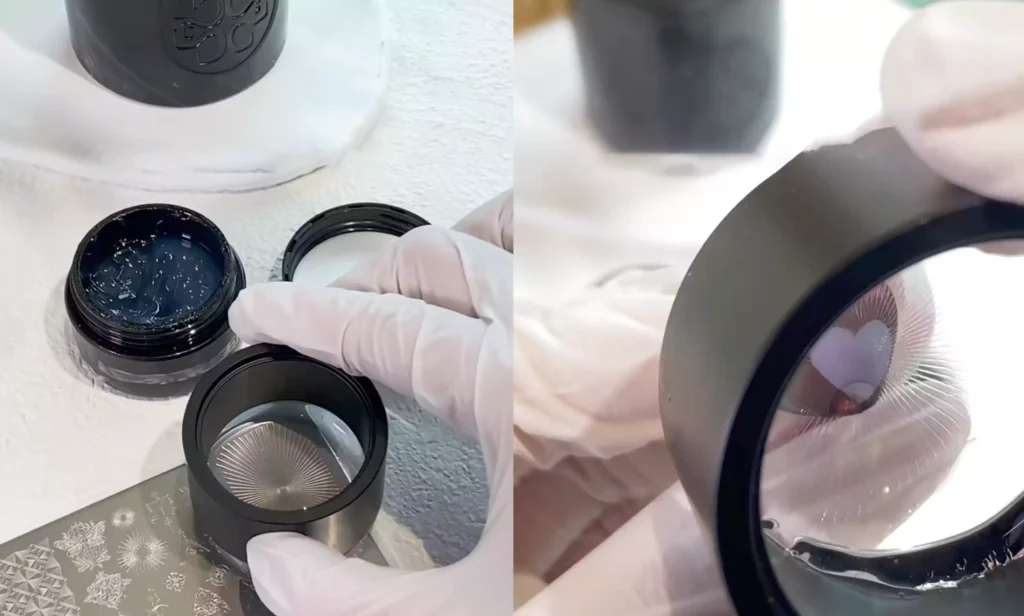
Fase 4: delineare i contorni con Magic Mirror Powder e Platinum Gel
Strofinare la polvere argentata Magic Mirror Powder sull'area del disegno del timbro. La polvere Magic Mirror darà al motivo una consistenza metallica, rendendo il "ricamo" ancora più realistico.
Poi, con la colla argentata e il pennello fine, tracciare il contorno esterno del cuore, esaltandone la tridimensionalità e la raffinatezza, come se si trattasse di un bordo metallico.
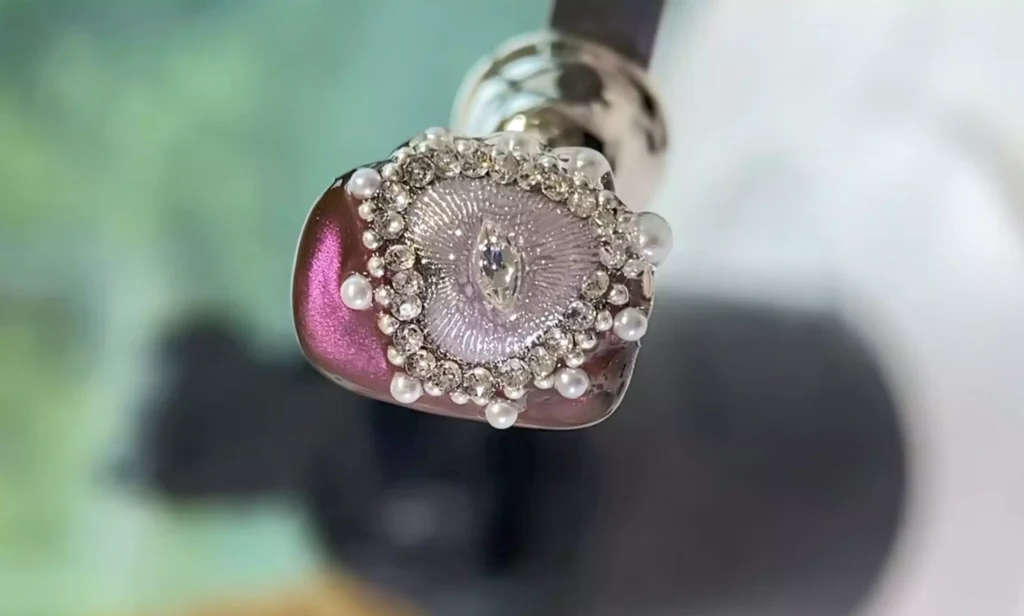
Fase 5: decorazione con diamanti e sfere d'acciaio
– Per prima cosa, posiziona il diamante “marquise trasparente” al centro del cuore (o punto focale visivo). La forma del diamante marquise simula gli angoli vivaci e netti di un “occhio”.”
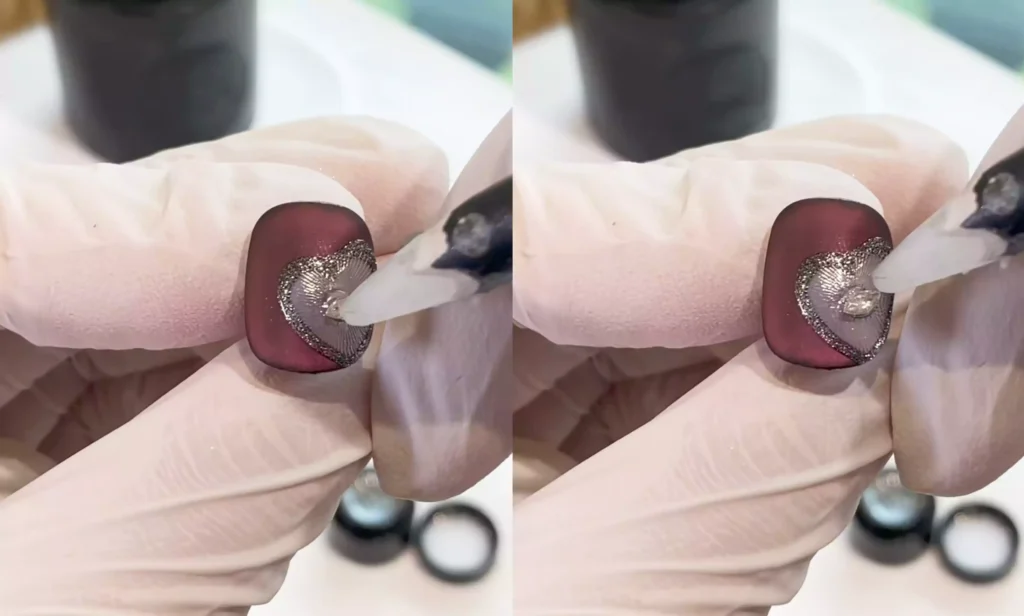
– Successivamente, applicate un cerchio di strass a punta intorno al cuore. La fitta disposizione degli strass a punta raddoppia la sensazione di lusso, e l'effetto è ancora più sorprendente quando la luce viene rifratta.
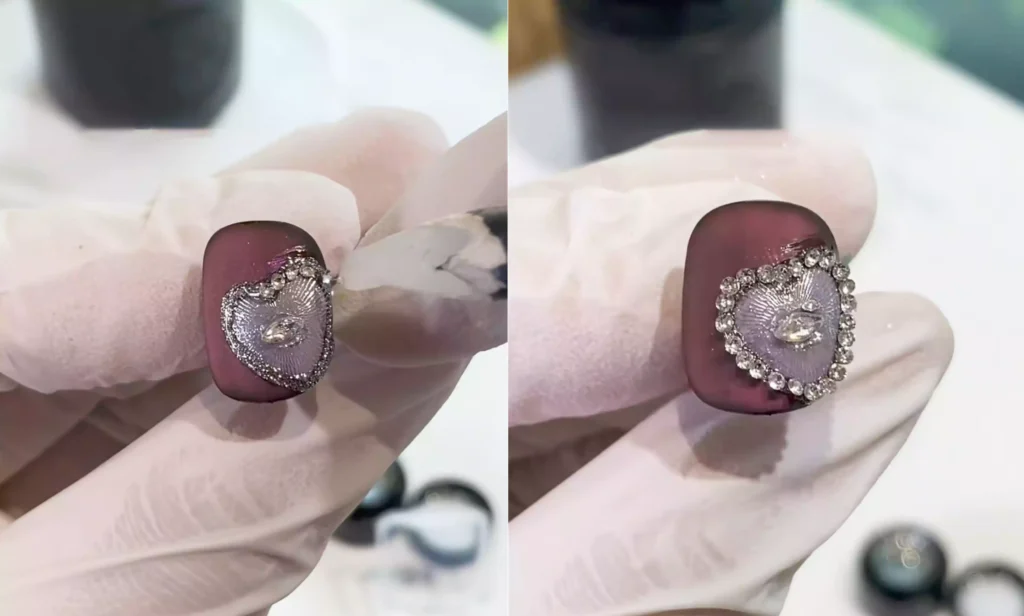
– Quindi prendi le sfere d'acciaio e inseriscile nello spazio tra la decorazione della fresa e la superficie dell'unghia per rendere gli strati complessivi più pieni e la transizione più naturale.
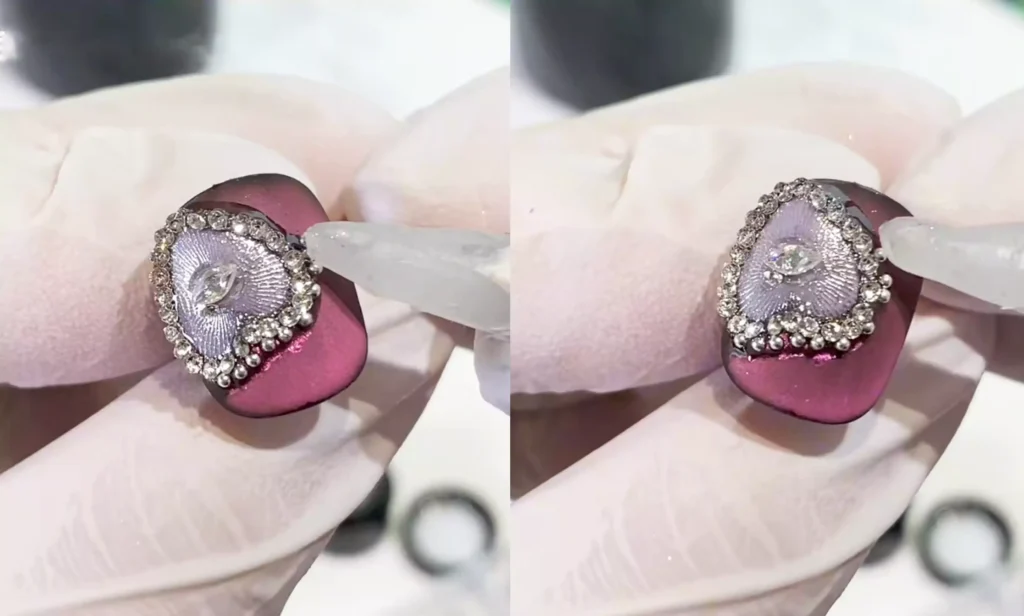
– Infine, aggiungi piccole perle come accenti e usa un top coat per fissare tutte le decorazioni, assicurando una lucentezza uniforme su tutta la superficie dell'unghia.
Seguendo questo processo, si otterrà una manicure che combina un look metallico fresco con un'eleganza lussuosa, perfetta per chi cerca uno stile unico e glamour.

Infine, raccomandiamo lo smalto gel di CHROMÉCLAIR. I loro prodotti si concentrano su sicurezza, bassa irritazione e rispetto dell'ambiente, e non contengono ingredienti nocivi, riducendo il rischio di allergie (Smalto gel senza HEMA). Proteggono le unghie sane, sono disponibili in una varietà di colori e hanno una lunga tenuta del colore (circa 21 giorni). Sono al passo con le ultime tendenze e garantiscono a ogni consumatore un'esperienza sicura e protetta.
Avete problemi con il funzionamento? Date un'occhiata al video tutorial qui sotto. Se lo trovate utile, mettete un like e salvatelo, iscrivetevi al mio canale e alla prossima!