Ciao, sono Starry. Sono stata immersa nel settore delle forniture per unghie per otto anni interi, lavorando ogni giorno con tutti i tipi di gel per unghie, formulazioni di ingredienti, problemi di allergia e test di resistenza all'usura. Conosco i dettagli di quasi tutti i gel costruttori presenti sul mercato e ho visto innumerevoli onicotecniche e utenti privati commettere errori evitabili semplicemente perché non conoscono a fondo questo prodotto.
Every other day, I get asked the exact same questions by my clients and nail techs alike: What is builder gel? How does it differ from normal gel polish? And is it good for damaged and thin nails?

In this article, I am going to share with you everything that I know after my eight years of experience in the industry to fully explain the builder gel, including the science behind it, correct application process, distinctions from normal gel nail polish, methods of removal, and picking up the least allergenic formulas possible. It is a guide without any useless information.
1. Per prima cosa, capire cos'è davvero il gel costruttore: non è solo uno smalto gel spesso.
Most novices to nail technology think of Liquid Builder Gel as simply “thicker gel polish.” This misconception is the number one cause of people using it incorrectly, experiencing poor durability, and even damaging their own nails.
From a technical standpoint, builder gel (sometimes referred to as sculpting gel or structuring gel) is high viscosity gel that can be cured using UV or LED light. The main function of the gel is not coloring but providing structural reinforcement of the natural nail. Always explain to your clients and students: if gel polish is the paint that makes a house look pretty, then builder gel is its foundation and support.
Passo successivo consigliato
Routine con gel lisciante e a lunga durata
Bolle, sfaldamento, restringimento e opacità sono solitamente problemi del sistema. Realizza la manicure contemporaneamente con la preparazione, la base, il colore e il top coat.
- Preparare la lamina ungueale prima di applicare lo smalto.
- Utilizzare una base coat che si abbini al sistema in gel.
- Completa il lavoro con uno strato di finitura compatibile per una maggiore durata e brillantezza.
Acquista un kit di routine a lunga durataScopri il top coat senza bisogno di puliziaConfronta tutte le routine
Funzioni principali: Ideale per unghie deboli e danneggiate
Builder gel has been created with the purpose of fixing all kinds of nail structure problems, with specific functions that were planned right from the start. It is an assisting and repairing agent, not just a cosmetic one:
- It strengthens brittle and weak nails, creating favorable conditions for proper nail growth
- Allows building natural nail extensions, repairing cracked, split or damaged nails
- Builds a structured nail shape, fixing flat or bent nails
Curare: Ogni secondo conta più di quanto si pensi
Professional UV/LED curing light is used to fully harden the builder gel. The average curing process takes 30–60 seconds if you use LED curing light, and it takes 2-3 minutes when you cure builder gel with the help of UV light, and it’s not negotiable. For my partner brand, I performed product testing on the same builder gel, and I tested two groups – the first one was cured for 45 seconds and the second for 20 seconds only. In 5 days’ time, the second group started to peel from edges and was less than half as hard as the first one.
In summary, under-curing is not only a waste of time but also of product. It makes nails fragile, binds soft gel to the nail bed and raises chances of irritation. So there is no need to hurry since a few additional seconds will ensure durability and nail protection.

2. Differenze chiave: Gel costruttore vs. smalto gel normale (oltre allo spessore)
This is the number one question I have been asked throughout my eight-year experience in this field. Although both are made from gel and need to be cured by using UV/LED light, they are completely separate products serving two completely separate purposes. No amount of expertise on your behalf will fix lifting and cracking of nails when you replace builder gel with regular gel polish. I have prepared a table to help beginners notice the difference right away:
| Categoria di confronto | Gel costruttore (Gel strutturante) | Smalto gel normale |
| Consistenza e struttura | Denso, ad alta viscosità, modellabile, a flusso minimo | Sottile, a bassa viscosità, colante, non riesce a mantenere la forma o a sopportare il peso |
| Scopo principale | Supporto strutturale, estensioni, riparazioni, rafforzamento dei chiodi (focus: durata) | Colore, lucentezza, finitura decorativa (focus: estetica) |
| Livello di forza | Elevata resistenza; portante, resiste alla flessione e alla rottura | Bassa resistenza; quasi nessun supporto strutturale, si appoggia solo sulla superficie dell'unghia. |
| Strumenti di applicazione | Richiede pennelli per scolpire, forme per unghie o guide per tip; richiede una tecnica precisa. | Si applica con un pennello incorporato, senza bisogno di strumenti speciali o abilità avanzate. |
But more importantly, when completely cured, the builder gel creates a very thick and compact three-dimensional cross-linked polymer network, combining the strength of acrylics and elasticity of soft gel. As compared to regular acrylics, the builder gel does not crack or chip easily and has considerably lower smell making it more pleasant to work with. That is the reason why it is used in salons across the world today.
Because of the thick nature of this material, care must be taken in applying it since improper application may result in bumps, bubbles, or an uneven surface, which needs to be done through thin layers and not in a haphazard way.
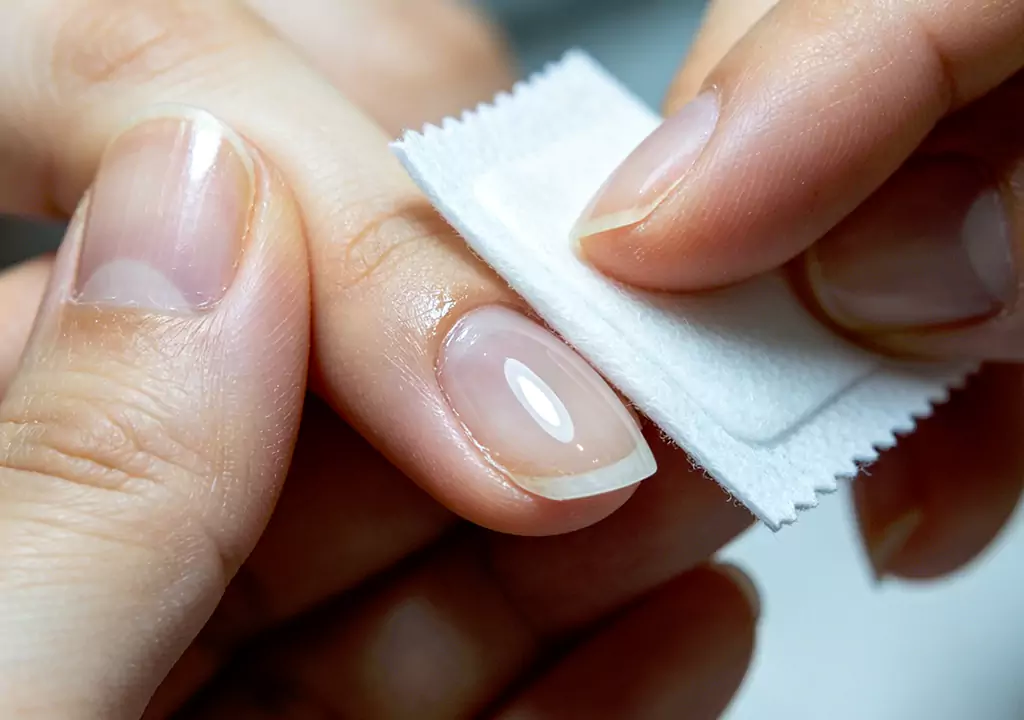
3. Rimozione sicura: Un passo sbagliato rovina mesi di crescita delle unghie
I have personally seen how many individuals tend to mess up their nails just by the incorrect removal of the gel after spending so much time on them with the help of builder gels. This is the most critical step in which people tend to make mistakes, and if not done correctly, all efforts go in vain. The following is my 4-Step Safe Removal Technique, based on 10 years of experience:
- Filing the Top Layer to Open the Seal: File the top layer using a medium nail file to scratch off the top layer and the glossy finish. Do not file through to the natural nail since you are only removing the seal to allow acetone in.
- The Soak & Wrap Method to Soften: Dip the cotton pads in pure acetone and wrap each nail with the cotton pads tightly and cover it with nail foil. Leave it like that for 10 to 15 minutes. There are some products with claims such as “2-minute soak off”, which are softening gel, follow the instructions only.
- Spingere delicatamente, non staccare o raschiare.: Una volta completamente ammorbidito, utilizzare un bastoncino di legno d'arancio o uno spingi cuticole in metallo per spingere delicatamente il gel fuori dal letto ungueale. Non scacciare, staccare o forzare mai, in quanto è la principale causa di danni permanenti alle unghie.
- Idratare immediatamente: Subito dopo la rimozione, applicare un olio per cuticole e una crema per unghie per idratare la lamina ungueale, la pelle circostante e i bordi dell'unghia, alleviando la secchezza causata dall'esposizione all'acetone.
There was a client of mine who wanted to save time by not doing the filing and removed the gel from her nails after only five minutes of soaking, scrubbing very vigorously in the process. She made her nail plate thin almost to half and her nails became super sensitive. It took 8 long months for her nails to get back to normal again.

4. Variazioni popolari: BIAB vs. Hard BIAB: qual è la scelta giusta per voi?
Structured gel manicure has become an absolute hit among all nail trends thanks to its easy builder gel technology. Two most popular nail trends are BIAB (Builder in a Bottle, which is also known as Plexigel), an easy-to-use single step structured gel. People often get confused between regular and hard BIAB, that is why I will discuss them both here.
BIAB regolare: ideale per la cura quotidiana e per extension leggere.
Regular BIAB is the most common variety. Its consistency is medium-thick, but the sculpting technique is made much simpler in one bottle, which makes it much more convenient to use than conventional builder gel. The result is a natural, flawless manicure that looks nothing like the bulky extension nails of the past, and can extend natural nails by 1 cm. Ideal for standard nail care and natural manicures.
BIAB duro: per unghie gravemente deboli o danneggiate
Hard BIAB is a superior, enhanced formulation that has twice the strength and rigidity of regular BIAB. This product is designed specifically for very thin, fragile, constantly breaking nails or for clients who have broken their nails due to biting or other trauma. I would always advise using Hard BIAB on such clients as it acts like a shield and allows nails to recover in a safe environment.
Kit per il fai-da-te in casa: Per i principianti, ma senza tagliare gli angoli
Home user friendly at-home kits from various brands now allow you to apply gel builder nails yourself by supplying custom nail forms and necessary tools for the procedure. This makes the process easier; however, there is a catch: usually home lights are not as powerful as those found in salons. The duration of the curing should be the same as prescribed, and you must apply thin layers as usual.
5. Guida agli acquisti: Certificazioni di sicurezza e ingredienti non sono negoziabili
Following eight years working in the nail industry, I would like to reiterate one fundamental principle: safety should be prioritized over beauty. When considering builder gels, never base your decision on price or color alone, particularly when you have delicate or allergy-prone nails. Here is what you need to keep in mind:
- SGS, MSDS, and FDA Standards: Go for SGS or MSDS-tested products that comply with FDA standards. These independent certification ensure the safety and non-irritating nature of the products. Never opt for unbranded and inexpensive products since you cannot compromise on your nail health.
- Evitare i più comuni fattori di allergia: L'HEMA (2-idrossietil metacrilato) è l'allergene più comune nei gel per unghie e il TPO è un fotoiniziatore ad alto rischio legato a reazioni cutanee come arrossamenti e prurito. Molti marchi rinomati offrono oggiSenza HEMA e senza TPO formule per utenti sensibili. Ad esempio, CHROMÉCLAIR offre una linea di prodotti completa che comprende Gel costruttore liquido, top coat diamante, Top coat opaco e Rivestimento di base in gomma, formulato senza questi ingredienti aggressivi. Non si tratta solo di eliminare alcune sostanze chimiche; si tratta di ridefinire la cura sicura delle unghie, mantenendo la durata e la brillantezza di un trattamento professionale e riducendo al minimo i rischi di allergie.

- Proper Storage Ensures Product Is Not Wasted: Builder gel is sensitive to light and heat. Avoid storing this product near sources of heat and light as it will cause premature thickening or curing. Thickening due to exposure to cold is expected and all you need to do is warm the bottle and it goes back to its proper consistency.
Approfondimento sul settore: Il gel costruttore potrebbe diventare uno strumento di riabilitazione delle unghie?
Besides the practical advice that I have provided above, there is one thought which I have spent much time thinking about over my eight-year career.
With more and more low-allergy, vegan and dermatologist tested formulas appearing on the market, the distinction between cosmetic nail treatments and professional nail care becomes blurred. One question comes to my mind: can builder gel become a clinical nail treatment device?
As it is today, dermatologists have little to go on when it comes to treating nail malnutrition, thin nails caused by trauma, and peeling nails. A mild builder gel that will help protect damaged nails and foster the growth of healthy ones could provide a great non-invasive complement to the work done by dermatologists.
Of course, extensive tests and medical approvals would be necessary, but there is no question where things are heading, as nail care is not simply about beauty any more but about having healthy nails. That has always been my guiding principle throughout my career.
Pensieri finali
Il gel costruttore non è un mistero: è un salvavita per le unghie deboli e danneggiate e la base di una manicure strutturata e di lunga durata. Seguite queste regole fondamentali: scegliete formule certificate e sicure, curate completamente, rimuovete correttamente ed evitate gli allergeni aggressivi. In questo modo, potrete ottenere unghie bellissime e mantenere sane le unghie naturali.
Mi piacerebbe sentire il vostro parere: Quali prodotti per unghie utilizzate attualmente? Se avete provato gel costruttore, Qual è la parte più impegnativa: la sagomatura e il livellamento o la rimozione sicura? Lasciate un commento qui sotto con le vostre esperienze o domande e cerchiamo di risolvere i problemi insieme. Dopo tutto, nel settore delle unghie, i dettagli fanno la differenza.