Today I’ll show you how to create a 3D butterfly manicure! The steps are explained in great detail, so even beginners can easily replicate it and become a master of exquisite manicures!

Fase 1: Creare un tono di base morbido
Base a sfumatura inversa: Scegliere uno smalto gel nude (qui ho usato CHROMÉCLAIR Smalto gel senza ema N. 13, atossico e salutare, scorre bene e consente un'applicazione uniforme anche ai principianti). Applicare solo sulla metà anteriore dell'unghia. Usare un pennello per sfumare delicatamente verso le radici, creando un gradiente inverso da più scuro davanti a più chiaro dietro, dando ai bordi un effetto vaporoso e soft-focus.
Utilizzare la colla glitter per illuminare: Applicare un sottile strato di colla glitter al centro dell'unghia, come se si volesse seppellire uno strato di diamanti nell'unghia.
Si illumina segretamente sotto la luce ed è molto raffinato.
Recommended next step
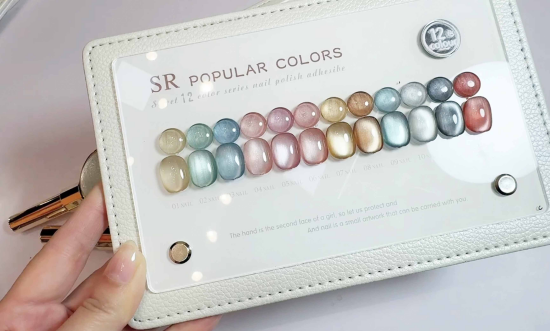
Build the Nail Art Look Kit
Tutorial looks need more than a color bottle. Choose the color, art detail, transfer or sticker step, and a top coat as one look kit.
- Choose the main color or set.
- Add the art detail: sticker, transfer gel, magnet, or brush.
- Seal the finished look with top coat.
Transparent color blending transition: Take transparent brown + transparent gray nail polish, dip a fan-shaped brush into the two, and gently pat them on the nails to make the different color blocks flow naturally, saying goodbye to the awkwardness of “clear distinction”;
Fase 2: modellare la farfalla 3D (creare una decorazione dell'anima)
La farfalla è il fulcro di questa manicure e creare una farfalla 3D è semplicissimo!
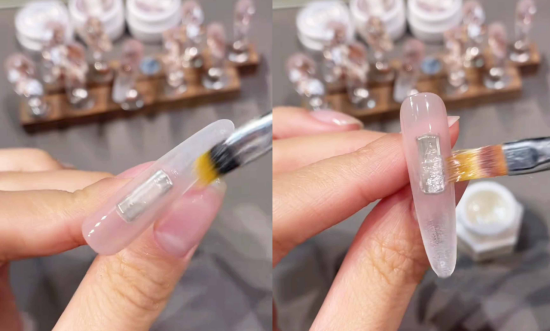
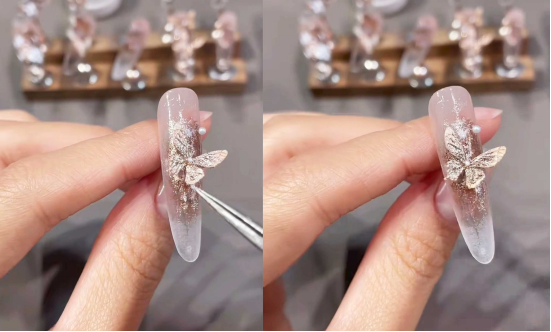
Filling and Curing the Mold: Take the transparent butterfly mold and use tweezers to apply an appropriate amount of clear molding glue. Evenly fill the mold’s butterfly grooves (be careful not to spill over the edges).
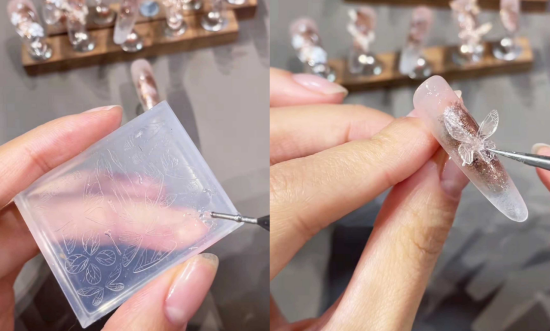
Stampaggio sotto una lampada: Posizionare lo stampo riempito di colla sotto una lampada per unghie affinché si asciughi (il tempo esatto dipende dalle istruzioni della colla, in genere 30-60 secondi). Una volta indurito, rimuovere delicatamente lo stampo per creare una farfalla trasparente e tridimensionale.
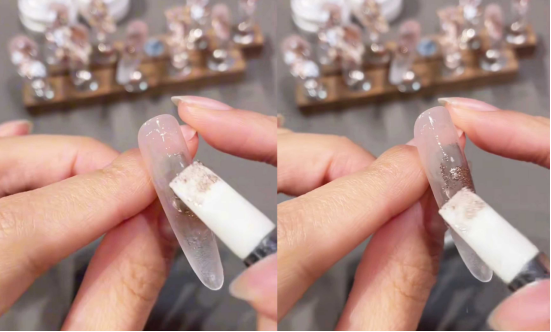
Posizionamento: Applicare una piccola quantità di primer sul retro della farfalla e farla aderire con precisione al centro visivo dell'unghia (ad esempio, la parte centrale superiore). Premere per qualche secondo per fissarla. La farfalla tridimensionale dà istantaneamente vita alla vostra nail art.
Step 3: Blend the Butterfly’s Color (Make It Vivid and Dynamic)
A plain, transparent butterfly isn’t eye-catching enough; give it a gradient makeup look and instantly transform it into a fingertip elf!
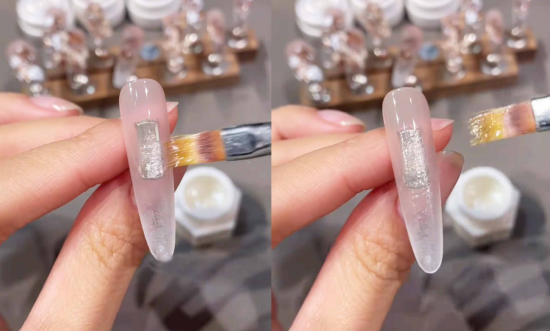
Apply a thin layer of glitter glue to the entire butterfly, creating a “pearlescent gauze dress” and adding a touch of translucence to the base color.
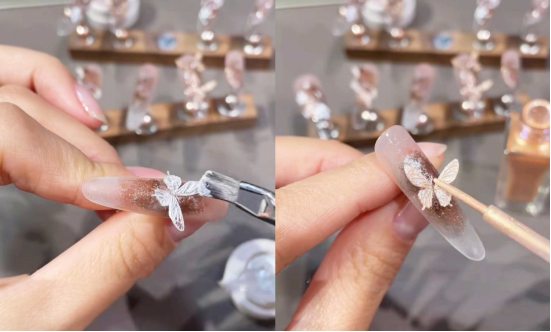
Orange Watercolor: Dip a fine brush into the watercolor and gently brush it across the butterfly’s surface, evenly tinting it with a warm orange hue. This instantly transforms the color from “transparent” to “vibrant.”
Gradient Wings: Focus on the edges and wrinkles of the wings, using a “dark to light” technique to create a gradient effect—dark at the base and lighter at the tip. This simulates the light and shadow gradations of a real butterfly’s wings, making them appear to “breathe.”
Step 4: Detailing & Topcoat (Securing the Elegance)
These last two steps provide a “safety” and “add-on” to your manicure, ensuring its long-lasting beauty.
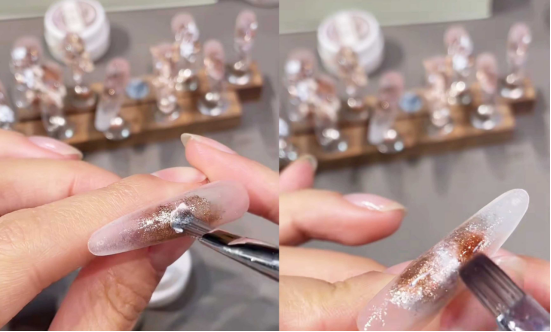
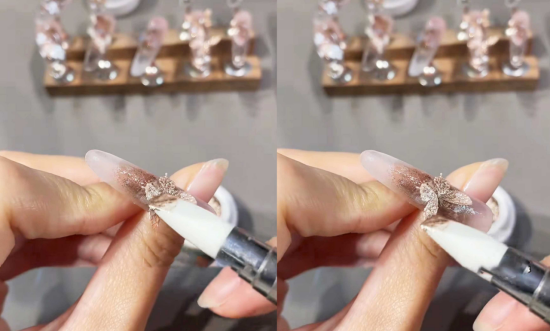
Abbellimenti leggermente lussuosi: Utilizzate una pinzetta per raccogliere mini perle e piccoli diamanti e applicateli intorno alla farfalla o in aree inutilizzate dell'unghia (come la base o i bordi). Scegliete perle di 2-3 mm per un look più raffinato, e scegliete diamanti con una sottile brillantezza per completare il colore di base.
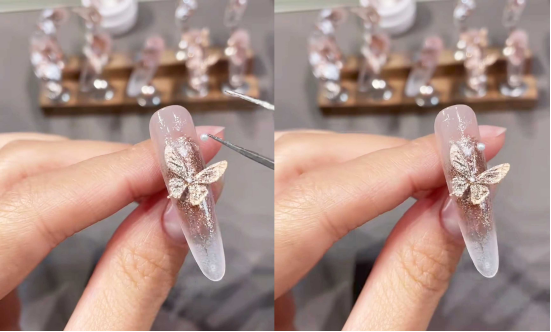
Finishing coat for the entire hand: Finally, apply a layer of super-bright finishing glue, evenly covering from fingertips to roots. This will not only make the manicure wear-resistant and scratch-resistant, but also make the base color, butterfly, and diamond decoration glossy and uniform to a “mirror-grade” finish.
Nel tutorial ho utilizzato lo smalto gel CHROMÉCLAIR. I loro prodotti hanno una buona fluidità, quindi anche i principianti possono applicarli in modo uniforme. Si concentrano sulla sicurezza, sulla bassa irritazione e sulla protezione dell'ambiente, non contengono ingredienti nocivi, riducono il rischio di allergie (Smalto gel senza HEMA), proteggere le unghie sane e garantire a ogni consumatore un'esperienza d'uso sicura e protetta.
Amici, salvate questa esercitazione e fate pratica. Se incontrate qualche problema durante il processo, potete guardare il video tutorial qui sotto. Se il tutorial vi è stato utile, vi prego di mettere "mi piace" e di iscrivervi. Ci vediamo nel prossimo tutorial!